
| 일 | 월 | 화 | 수 | 목 | 금 | 토 |
|---|---|---|---|---|---|---|
| 1 | 2 | 3 | 4 | |||
| 5 | 6 | 7 | 8 | 9 | 10 | 11 |
| 12 | 13 | 14 | 15 | 16 | 17 | 18 |
| 19 | 20 | 21 | 22 | 23 | 24 | 25 |
| 26 | 27 | 28 | 29 | 30 | 31 |
- hardhat
- Interface
- express.js
- Props
- bitcoin
- SSR
- evm
- Ethereum
- CLASS
- typeScript
- concept
- error
- solidity
- built in object
- HTML
- tailwindcss
- API
- useState
- middleware
- 삶
- 기준
- JavaScript
- node.js
- web
- graphQL
- nextJS
- CSS
- Redux
- blockchain
- REACT
- Today
- Total
ReasonJun
ZKP : Practice and Understand 본문
Overview of Zero-Knowledge Proofs (ZKPs)
Zero-Knowledge Proofs (ZKPs) are cryptographic methods that allow a prover to convince a verifier that a given statement is true without revealing any additional information beyond the validity of the statement itself. Key concepts include:
- Statement: The proposition or computation that needs to be proven.

- Witness: The private information that proves the statement.
- Prover: The entity that proves the statement.

- Verifier: The entity that verifies the proof.

1. Writing the Circuit (Arithmetic Constraints)
Circom is a domain-specific language for defining arithmetic circuits that represent the constraints of a ZKP. The example circuit provided is as follows:
pragma circom 2.0.0;
template Demo() {
signal input x;
signal input y;
signal input z;
signal input out;
signal T1;
T1 <== (x - 2) * (y + 3);
signal T2;
T2 <== (z + 4) * (z + 5);
out === T1 * T2 + 6;
}
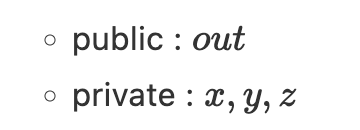
component main {public [out]} = Demo();
This circuit takes inputs x, y, and z, and calculates intermediate signals T1 and T2, which are then used to compute the output out. The constraints ensure that the output is correctly derived from the inputs according to the defined arithmetic operations.
2. Installing Circom and Snarkjs
Circom and Snarkjs are essential tools for compiling circuits and generating proofs. The installation steps are as follows:
# Install Circom
git clone <https://github.com/iden3/circom.git>
cd circom
cargo build --release

# Install Snarkjs
git clone <https://github.com/iden3/snarkjs.git>
cd snarkjs
npm install
npm run build
Circom is a Rust-based compiler for arithmetic circuits, while Snarkjs is a JavaScript library for generating and verifying zk-SNARKs.
3. Compiling the Circuit
Once the circuit is written, it needs to be compiled into an R1CS (Rank-1 Constraint System) file, which represents the constraints of the circuit.
~/circom/target/release/circom --r1cs --sym --json --O0 --output build demo.circom
This command compiles demo.circom into several files:
- demo.r1cs: The constraints of the circuit.
- demo.sym: Symbolic representation of the circuit.
- demo.json: JSON representation of the circuit.
4. Inspecting the Constraints
Snarkjs can be used to inspect the constraints defined in the R1CS file.
~/snarkjs/build/cli.cjs r1cs print build/demo.r1cs build/demo.sym
This command prints out the constraints in a human-readable format, allowing you to verify that the circuit was compiled correctly.
5. Calculating the Witness
The witness is a set of values that satisfy the circuit's constraints given certain inputs. The witness is computed using a WebAssembly (WASM) file generated by Circom.
# Generate the witness
node build/demo_js/generate_witness.js build/demo_js/demo.wasm input.json build/demo_js/witness.wtns

# Export the witness to JSON
~/snarkjs/build/cli.cjs wtns export json build/demo_js/witness.wtns wtns.json
input.json contains the input values for the circuit, and witness.wtns is the computed witness file.
6. Setting Up (Proving and Verification Keys)
Using the Groth16 protocol, you generate proving and verification keys. These keys are essential for creating and verifying proofs.
# Generate proving and verification keys
~/snarkjs/build/cli.cjs groth16 setup build/demo.r1cs ptau_file demo.zkey

# Export the verification key
~/snarkjs/build/cli.cjs zkey export verificationkey demo.zkey vk.json
ptau_file is a Powers of Tau file used for the initial setup. demo.zkey contains the proving and verification keys.
7. Generating and Verifying the Proof
With the proving key, you can generate a proof, and with the verification key, you can verify it.
# Generate the proof
~/snarkjs/build/cli.cjs groth16 prove demo.zkey build/demo_js/witness.wtns proof.json public.json

# Verify the proof
~/snarkjs/build/cli.cjs groth16 verify vk.json public.json proof.json
proof.json contains the generated proof, and public.json contains the public inputs. The verification step checks if the proof is valid given the public inputs and the verification key.

1. Flatten the Problem Polynomial and Construct the Corresponding Circuit
This step is performed by the upper-level application and involves the following tasks:
- Flattening the Problem Polynomial: This involves transforming the problem into a polynomial form that can be expressed as a circuit. For example, breaking down a complex computation into a series of simple arithmetic operations.
- Constructing the Circuit: Based on the flattened polynomial, a logical circuit is designed. This circuit consists of inputs, outputs, and a series of gates (operations) that perform the necessary computations.
2. Generate R1CS (Rank-1 Constraint System) According to the Circuit
R1CS is a system of constraints that represents the circuit. Each constraint is expressed using three vectors a, b, c
and must satisfy the following equation:
<a,z>·<b,z> = <c,z>
where z is a vector that includes all variables and 1. In this step, each gate and connection in the circuit is translated into an R1CS constraint, creating a system of equations that the circuit must satisfy.
3. Convert R1CS to QAP (Quadratic Arithmetic Program)
QAP is a polynomial-based constraint system derived from R1CS. The conversion process involves:
- Traditional Lagrange Interpolation: This method finds polynomials that pass through a given set of points. However, it can be computationally expensive.
- Fast Fourier Transform (FFT): FFT is an algorithm that can quickly evaluate and interpolate polynomials. Using FFT, the polynomials A(x), B(x), C(x) for the QAP can be generated more efficiently, reducing the computational complexity to O(n log n).
4. Setup Parameters of the QAP Problem, i.e., CRS (Common Reference Strings)
CRS are common reference strings that include parameters necessary for proof generation and verification. This step involves:
- Generating the CRS: Based on the QAP polynomials, the CRS is generated.
- Setting Common Parameters: The generated CRS is used to establish common parameters that both the prover and verifier will use.
5. Create Proof Based on CRS and Input
In this step, the proof is generated using the CRS and the input values:
- Preparing Inputs: The inputs to the circuit are prepared.
- Generating the Proof: Using the prepared inputs and the CRS, the proof is generated. This involves using the QAP polynomials and the input values to produce proof data.
- Proof Data: The generated proof data is in a format that can be verified by the verifier.
6. Verify Proof
The verification step involves the following tasks:
- Receiving Proof Data: The verifier receives the proof data generated by the prover.
- Verification Process: Using the received proof data and the CRS, the verifier checks the validity of the proof. This involves using the QAP polynomials and the common parameters to ensure the proof is correct.
- Result Confirmation: Based on the verification process, the verifier determines whether the proof is valid. If valid, it confirms that the statement being proven is true.
Summary
This overall process is designed to securely prove and verify complex computational problems. Each step transforms the problem into a polynomial form, generates a constraint system (R1CS), converts it to a polynomial-based system (QAP), and uses common reference strings (CRS) to efficiently generate and verify proofs. Using Fast Fourier Transform (FFT) reduces computational complexity, making the proof generation and verification process more efficient. The CRS enables both the prover and verifier to use common parameters, ensuring the integrity and security of the proof system.
'Blockchain > Words' 카테고리의 다른 글
| Crypto : Travel Rule (3) | 2023.10.18 |
|---|---|
| What Is Cross-Chain Interoperability? (0) | 2023.09.10 |
